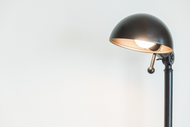
How to tuen a Metal item into a lamp fitting
Posted by Richard Hobbs on Jul 31, 2023
Today we'll walk you through the simple yet rewarding process of transforming a metal item into a stylish and functional lamp fitting. By repurposing old metal, you not only do your bit to recycle but also add a personal touch to your home decor. Let's get started on this exciting project that combines creativity and sustainability.
Materials Needed:
- Metal item (old kettle, teapot, vase, or any other metal object you want to repurpose)
- Lamp kit (available at hardware stores)
- Lampshade
- Power drill
- Metal hole saw bit
- Metal file
- Screwdriver
- Wire stripper
- Wire nuts
- Safety goggles and gloves
Step 1: Choose the Perfect Metal Item
Browse through thrift stores, flea markets, or even your own attic to find a metal item that catches your eye. Look for unique shapes and designs that would make a striking lamp base.
Step 2: Prepare the Metal Item
Clean the metal item thoroughly with soap and water. Remove any stickers, dirt, or grime to create a smooth surface for the next steps.
Step 3: Create a Hole for the Lamp Kit
Using a power drill and a metal hole saw bit, carefully create a hole in the bottom or side of the metal item. This hole will be used to feed the lamp cord through. Remember to wear safety goggles and gloves during this step to protect yourself from metal shavings.
Step 4: Smooth the Edges
After drilling the hole, use a small rat's tail file to smoothen the edges of the newly created hole.
Step 5: Assemble the Lamp Kit
Follow the instructions provided with the lamp kit to assemble the electrical components. Thread the lamp cable through the hole you created in the metal item. Depending on the type of lamp kit, you may need to connect the cord to a lampholder or other electrical parts. If you're unsure, consult the manual or seek advice from a professional.
Step 6: Secure the Lamp Kit Inside the Metal Item
Position the lamp kit components inside the metal item. Make sure the cord is securely in place, and the bulb holder is correctly attached to the interior of the item. Use a screwdriver to tighten any screws and ensure everything is stable.
Step 7: Connect the Wires
Connect the lampholder up as per the instructions with the kit. Ensuring the cables are tight and not loose.
Step 8: Attach the Lampshade
Choose a lampshade that complements the metal item and your overall interior decor. Carefully place the lampshade on top of the lamp kit's bulb holder or attachment mechanism.
Step 9: Test Your Lamp
Before plugging in your lamp, double-check all connections and make sure everything is properly assembled. Once you're confident in your work, plug in the lamp and switch it on to see your creation come to life!
Congratulations! You've successfully turned a simple bit of metal into a stunning lamp fitting that adds character and warmth to your living space. This upcycling project not only saves money but also contributes to reducing waste and promoting a greener lifestyle. Enjoy your new, one-of-a-kind metal lamp and get ready to receive compliments from your guests on your creativity and style! Happy DIY-ing!


